The Hewlett-Packard 15-g013cl is a popular laptop model that may require disassembly for various reasons, such as cleaning the cooling fan or replacing internal components. In this guide, we will walk you through the step-by-step process of disassembling the HP 15-g013cl.
- Tools and Materials Needed
- Step 1: Preparation
- Step 2: Removing the Battery
- Step 3: Removing the Hard Drive
- Step 4: Removing the Memory Modules
- Step 5: Removing the Optical Drive
- Step 6: Removing the Keyboard
- Step 7: Removing the Display Assembly
- Step 8: Removing the Motherboard
- Step 9: Cleaning and Reassembly
- Frequently Asked Questions
Tools and Materials Needed
Before you begin the disassembly process, make sure you have the following tools and materials:
- Phillips screwdriver
- Flathead screwdriver
- Plastic spudger
- Tweezers
- Cotton swabs
- Isopropyl alcohol
Step 1: Preparation
Start by shutting down your laptop and disconnecting all external power sources. It's also a good idea to ground yourself to prevent any static electricity damage to the internal components. You can do this by touching a metal object or wearing an anti-static wristband.
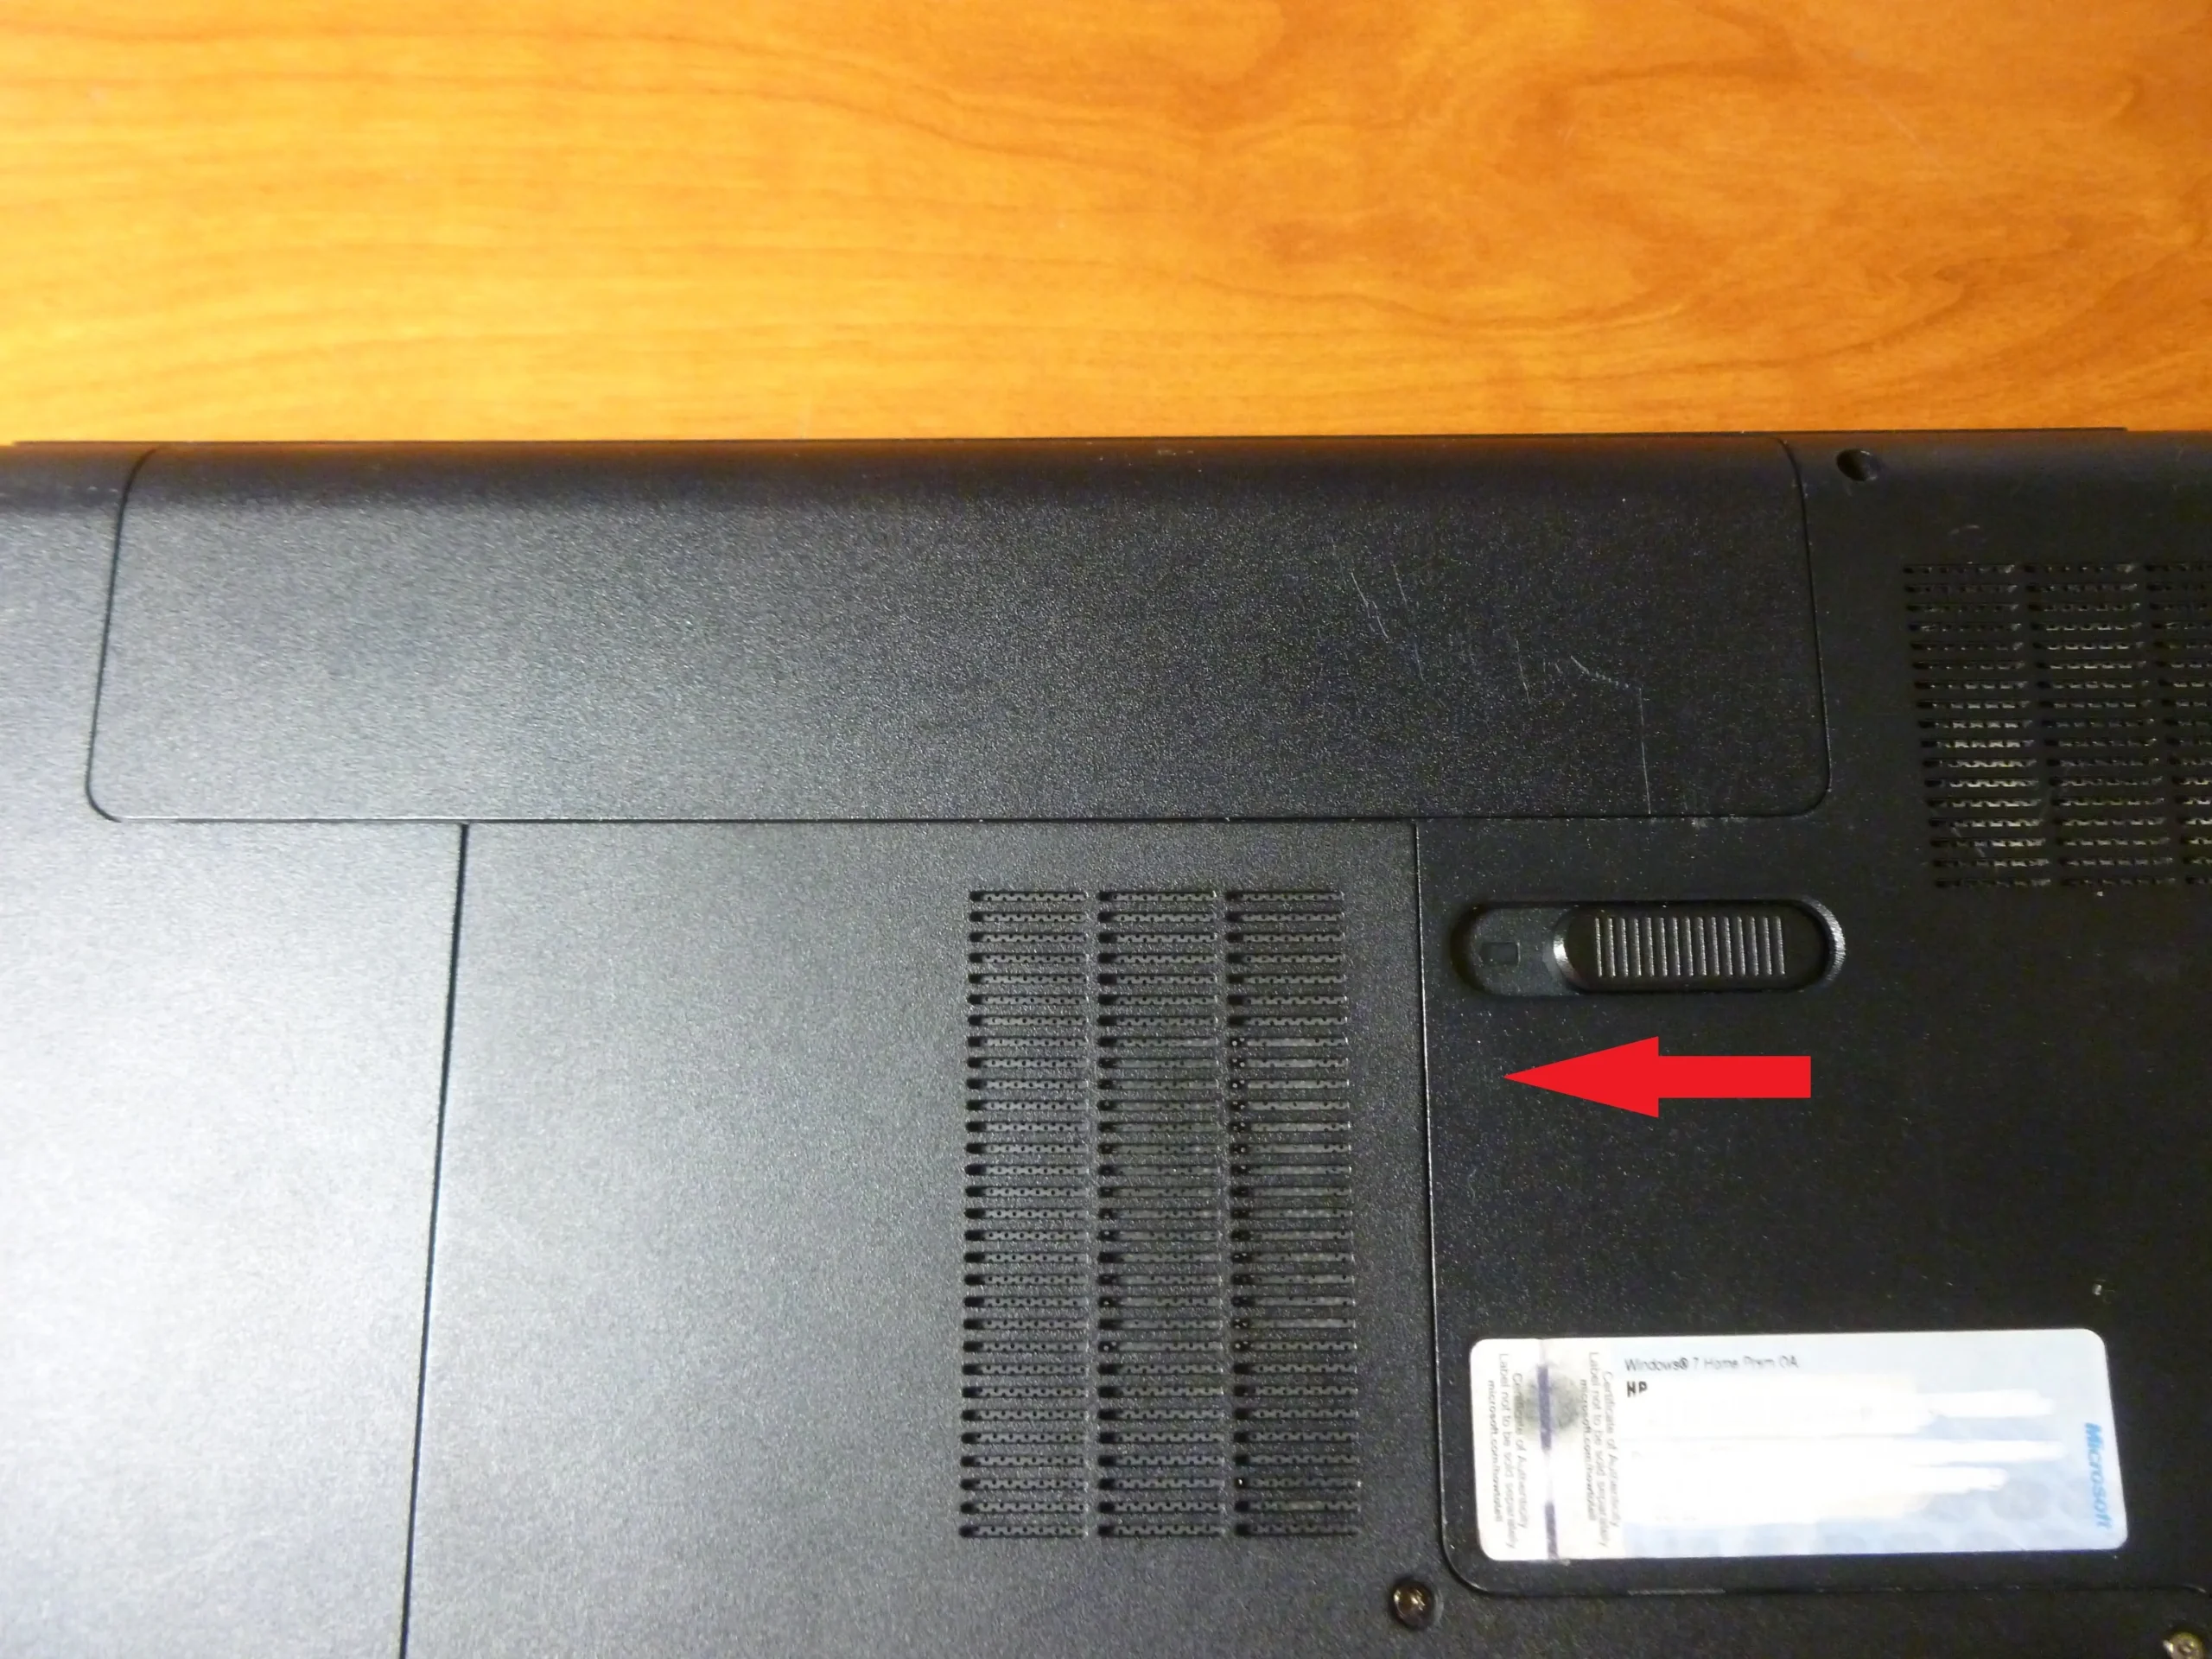
Step 2: Removing the Battery
Locate the battery release latch on the bottom of the laptop. Slide the latch to the unlock position and hold it there. While holding the latch, use your other hand to lift the battery out of its compartment. Set the battery aside.
Step 3: Removing the Hard Drive
Next, locate the hard drive compartment on the bottom of the laptop. Remove the screws securing the compartment cover and lift the cover off. Disconnect the SATA cable from the hard drive and carefully remove the hard drive from its bay.
 Analyzing hewlett-packard (hpe) stock price: trends, factors, and analyst targets
Step 4: Removing the Memory Modules
Remove the screws securing the memory module cover and lift the cover off. Gently spread the retaining clips on each side of the memory module to release it from its slot. Repeat this process for any additional memory modules installed in your laptop.
Step 5: Removing the Optical Drive
If your laptop has an optical drive, remove the screws securing it and slide the drive out of its bay.
Step 6: Removing the Keyboard
Start by removing the screws securing the keyboard. Some screws may be hidden under rubber plugs, so you may need to use a spudger or a small flathead screwdriver to lift the plugs. Once the screws are removed, gently lift the keyboard up and disconnect the ribbon cable connecting it to the motherboard. Set the keyboard aside.
Step 7: Removing the Display Assembly
Remove the screws securing the display hinges on both sides of the laptop. Carefully lift the display assembly up and disconnect any cables connecting it to the motherboard. Set the display assembly aside.
Step 8: Removing the Motherboard
Remove all screws securing the motherboard to the laptop chassis. Disconnect any remaining cables and connectors attached to the motherboard. Carefully lift the motherboard out of the laptop.
 Hpe careers: professional growth opportunities at hewlett packard enterprise
Step 9: Cleaning and Reassembly
Now that you have disassembled the laptop, you can clean the internal components using cotton swabs and isopropyl alcohol. Pay special attention to the cooling fan and the heat sink, as they tend to accumulate dust over time. Once you have cleaned the components, reassemble the laptop by following the disassembly steps in reverse order.
Frequently Asked Questions
Can I disassemble my HP 15-g013cl without damaging it?
As long as you follow the disassembly steps carefully and use the appropriate tools, you should be able to disassemble your HP 15-g013cl without causing any damage. However, it's always a good idea to proceed with caution and take your time to avoid any mishaps.
Do I need any special skills to disassemble my laptop?
While disassembling a laptop requires some technical knowledge, it can be done by anyone with basic computer skills. Just make sure to follow the instructions carefully and take note of the location of each screw and cable.
What should I do if I encounter any difficulties during the disassembly process?
If you encounter any difficulties or are unsure about any step of the disassembly process, it's best to consult the official HP service manual for your specific laptop model. You can also seek assistance from a professional technician if needed.
Is it necessary to clean the internal components of my laptop?
Over time, dust and debris can accumulate inside your laptop, especially in the cooling fan and heat sink. This can lead to overheating and decreased performance. Cleaning the internal components periodically can help prevent these issues and prolong the lifespan of your laptop.
 Hp - leading provider of technology products and services
Disassembling the Hewlett-Packard 15-g013cl may seem like a daunting task, but with the right tools and careful attention to detail, it can be done successfully. Just remember to take your time, follow the steps in the correct order, and exercise caution to avoid any damage to the internal components. Good luck!