
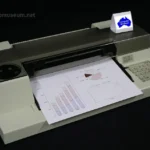
The Hewlett Packard C4180 is a multifunctional printer designed to meet the printing, scanning, and copying needs of both home and small office users. With its sleek design and advanced features, this printer offers convenience and high-quality printing at an affordable price. In this article, we will explore the key features of the Hewlett Packard C4180 and provide a step-by-step guide on how to install and set up the printer.
Key Features
The Hewlett Packard C4180 comes packed with a range of features that make it a versatile all-in-one printer. Here are some of its key features:
- Print, Scan, and Copy: The C4180 allows you to print, scan, and copy documents and photos, eliminating the need for multiple devices.
- High-Quality Printing: With a print resolution of up to 4800 x 1200 optimized dpi, the C4180 delivers sharp and vibrant prints.
- Memory Card Slots: The printer is equipped with memory card slots that support various types of memory cards, allowing you to print directly from your camera's memory card.
- Borderless Printing: The C4180 supports borderless printing, enabling you to print photos without any white borders.
- Easy-to-Use Interface: The printer features an intuitive control panel and a 4-inch color LCD display, making it easy to navigate and manage your printing tasks.
Installation and Setup
Step 1: Unboxing and Physical Setup
Start by unboxing the Hewlett Packard C4180 printer and removing all the packaging materials. Connect the power cord to the printer and plug it into a power outlet. Next, turn on the printer and follow the on-screen instructions to set the language, date, and time.
Step 2: Installing Ink Cartridges
Open the ink cartridge access door on the printer. Wait for the carriage to stop moving and become silent. Remove the new ink cartridge from its packaging and carefully remove the plastic tape. Insert the cartridge into the corresponding slot and press it down until it clicks into place. Repeat this process for all the ink cartridges.
Step 3: Loading Paper
Open the input tray and slide the paper width guides to their outermost positions. Load a stack of plain white paper into the input tray and adjust the width guides so they lightly touch the paper. Make sure not to overload the tray.
 Hp plotter printers: precision and detail for professionals
Step 4: Installing Software
Insert the installation CD that came with the printer into your computer's CD/DVD drive. Follow the on-screen instructions to install the necessary software and drivers for the printer. If you don't have the installation CD, you can download the latest software and drivers from the Hewlett Packard website.
Step 5: Connecting to a Computer
Once the software installation is complete, connect the printer to your computer using a USB cable. The computer will automatically detect the printer and configure the necessary settings.
Step 6: Test Print
After the printer is successfully connected to your computer, perform a test print to ensure that everything is set up correctly. Open a document or photo on your computer and select the print option. The printer should start printing the document or photo.
Frequently Asked Questions
Q1: Can I use the Hewlett Packard C4180 wirelessly?
A1: No, the C4180 does not support wireless connectivity. It can only be connected to a computer using a USB cable.

 Hp printer reviews: reliability & performance analysis
Q2: What types of memory cards are supported by the C4180?
A2: The C4180 supports various types of memory cards, including CompactFlash, Memory Stick, MultiMediaCard, Secure Digital, SmartMedia, and xD-Picture Card.
Q3: Can I print directly from my smartphone or tablet?
A3: No, the C4180 does not support direct printing from smartphones or tablets. It can only print from a computer connected via USB.
The Hewlett Packard C4180 is a reliable and feature-packed all-in-one printer that offers high-quality printing, scanning, and copying capabilities. Its user-friendly interface and versatile functionality make it a great choice for both home and small office users. By following the step-by-step installation guide provided in this article, you can easily set up the C4180 and start enjoying its numerous features.