
If you are looking to disassemble your HP Hewlett Packard laptop, whether it's to change out components, clean the system, or scrap the internal components, this guide will walk you through the process. It's important to note that laptop configurations can vary, so some steps might differ slightly depending on the manufacturer. However, the general process remains the same.
Step 1: Turn off the computer
Before you begin, make sure to turn off the computer, unplug it, and remove the battery. This will ensure your safety and prevent any potential damage to the laptop. It's also recommended to wear an ESD wristband or touch an unpainted piece of metal to discharge any static electricity.
Step 2: Remove back panels
Start by removing the back panels of the laptop. Unscrew all the available screws, including those hidden under rubber feet or stickers. It's important to keep track of the screws and organize the covers so you can easily put them back in the correct places later.
Step 3: Remove components
Once the back panels are removed, you'll have access to various components. Start by disconnecting cables and removing the storage drive, memory, and wireless card. If there are screws holding the storage drive in place, remove them carefully. To remove the memory modules, press down on the clips that hold them in place and pop them out at a 30-degree angle. Be cautious not to touch the gold pins on the modules. The wireless card can be removed using clips similar to the memory modules.
Step 4: Remove hinge cover plate
The next step is to remove the hinge cover plate and keyboard. Check for screws on the hinge cover plate and remove them if necessary. Then, try to pry up the hinge cover plate. If there is resistance, double-check for any hidden screws. Once the hinge cover plate is loose, remove it entirely. To remove the keyboard, remove the screws found under the hinge cover plate. Be careful not to pull out the ribbon cable under the keyboard; instead, lift the plastic hinge that holds it in place. Remove any other cables in the area under the keyboard by moving the connectors either up or forward.
 How to access system information on hp computers
Step 5: Remove laptop screen
To remove the laptop screen, start by disconnecting the antenna cable and the LCD data cable that connects from the area under the keyboard to the bottom edge of the screen. Remove the screws that connect the display to the hinge area. These screws may be located on the back of the display or inside where the keyboard was. Gently remove the display assembly.
Step 6: Remove screws
On the screen, remove the black rubber pads around the edges to access more screws. Use your fingernails to remove the pads, avoiding aggressive tools that could tear them. Remove all the screws you find. Pry the front cover of the screen away from the back part, and if you feel resistance, check for any missed screws. To remove the screen, unscrew the very small screws located on the side of the LCD screen. Avoid touching the back part of the screen. This will allow you to access the fluorescent lamp inverter.
Step 7: Pry case apart
Pry the case on the bottom of the laptop apart. Remove the touchpad and continue removing screws while disconnecting the cables attached to the motherboard. It's not always necessary to remove all the screws on the motherboard, as some of them hold the motherboard components in place. Pay attention to any marked screws that indicate which ones need to be removed. Once all the screws have been removed, the motherboard should come out without resistance. If there is any resistance, double-check for additional screws.
After disassembling your HP Hewlett Packard laptop, you may need to rebuild it. It's essential to document each step, take pictures, and keep track of where each component goes, which cables are connected to it, and where the slack from the cable is stored. Reinsert the screws in the holes they came from or tape them near the appropriate hole on the component to avoid mix-ups.
By following these steps, you can safely disassemble and rebuild your HP Hewlett Packard laptop. Remember to exercise caution, keep track of your screws, and consult the manufacturer's instructions if you encounter any difficulties. Happy disassembling!
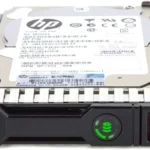 Hewlett packard enterprise hdd: the ultimate guide